
Add footage with + Video or + Image Sequence in Media Library, or use the matching File menu command. Select the source you want before pressing Track Shot.
Import your footage
| Source | Recognized formats | Import |
|---|---|---|
| Video | MP4, MOV, MKV, AVI, MXF, WEBM, BRAW | Select a file. CreativeTrack reads its timing and available format metadata. |
| Image sequence | EXR, PNG, JPG, JPEG, BMP | Select the frame folder, then set the frame rate. |
Container support does not guarantee every codec can decode. If a file fails, read the Job Log and keep the original while preparing a supported copy.
For sequences, use a folder containing only the intended frames. Consistently padded names such as shot_000001.exr, shot_000002.exr and shot_000003.exr keep the order clear. Preview reads supported files directly inside the folder in filename order.
Set the correct frame rate
Media Details shows the source type, path and available metadata. Select Show in Explorer to find the source on disk.
Image Sequence Frame Rate defaults to 24 FPS. Choose 23.976, 24, 25, 29.97, 30, 48, 50, 59.94 or 60, or enter a custom rate from 1 to 240 FPS. This controls preview, tracking and scene-export timing. Use the sequence’s intended playback rate.
Before each run, check the frame rate, Shot Name, Output Directory and range. Selecting another source does not necessarily replace an output folder you previously chose.
Preview and inspect
| Control | Action |
|---|---|
| First frame | Jump to the start. |
| Previous frame | Step back one frame. |
| Play / Pause | Start or pause the preview. |
| Next frame | Step forward one frame. |
| Last frame | Jump to the end. |
| Speaker | Mute or unmute available preview audio. |
| Timeline | Drag the playhead to inspect a frame. |
Use the timecode and frame counter to locate the section you need. Image sequences have no soundtrack, and video audio depends on the preview path.
Choose the processing range
- Scrub to the first frame you want.
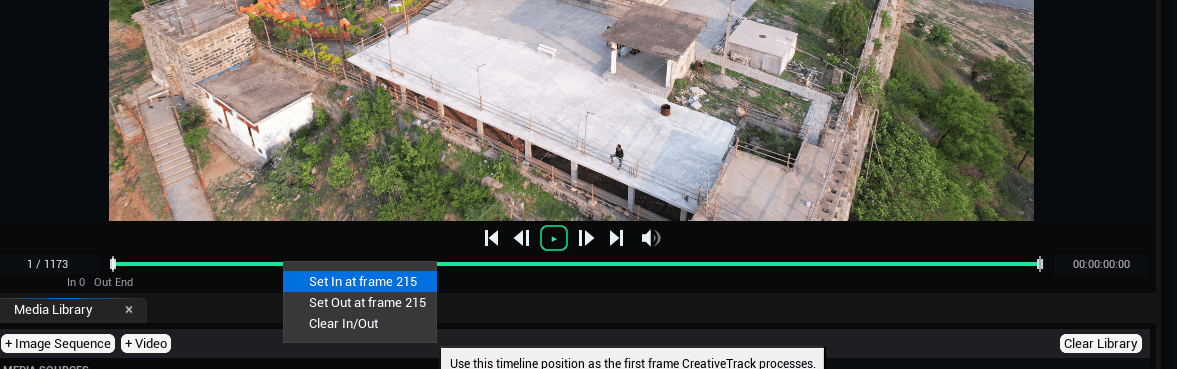
- Drag the In handle, or right-click the timeline and select Set In at frame N.
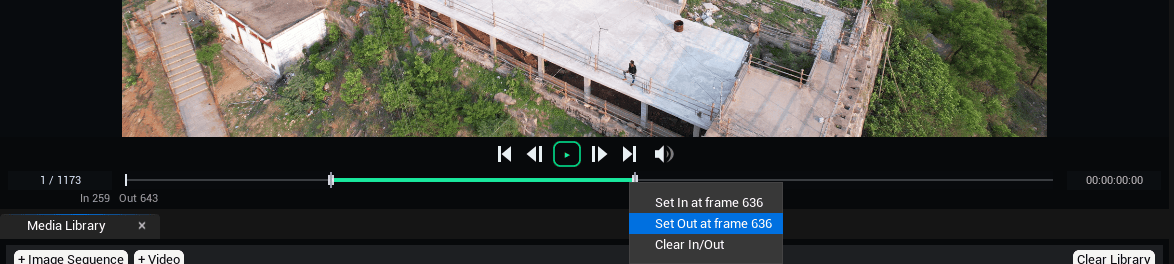
- Set the final frame with the Out handle or Set Out at frame N.
- Check both marks before processing.
Timeline numbering starts at 0, and the Out frame is included. In/Out marks choose frames for tracking or separate media conversion without trimming the originals.
Select Clear In/Out in the timeline menu or Edit → Clear In/Out Range to restore the full source range.
Start a fresh session
Clear Library unloads the media and resets settings, processing history, Job Log and preview caches. Completed output folders and imported Unreal assets remain intact. You cannot clear the library while an operation runs.
